Quick Book Flow
How a guest books a meeting room from the moment they walk up to the door display, scan the QR code, and finish with the access details email in their inbox.
Overview
This guide walks through the full ZenSpace Quick Book flow — from scanning the room QR code to receiving the confirmation email. The entire flow takes under a minute and requires no app install or login.
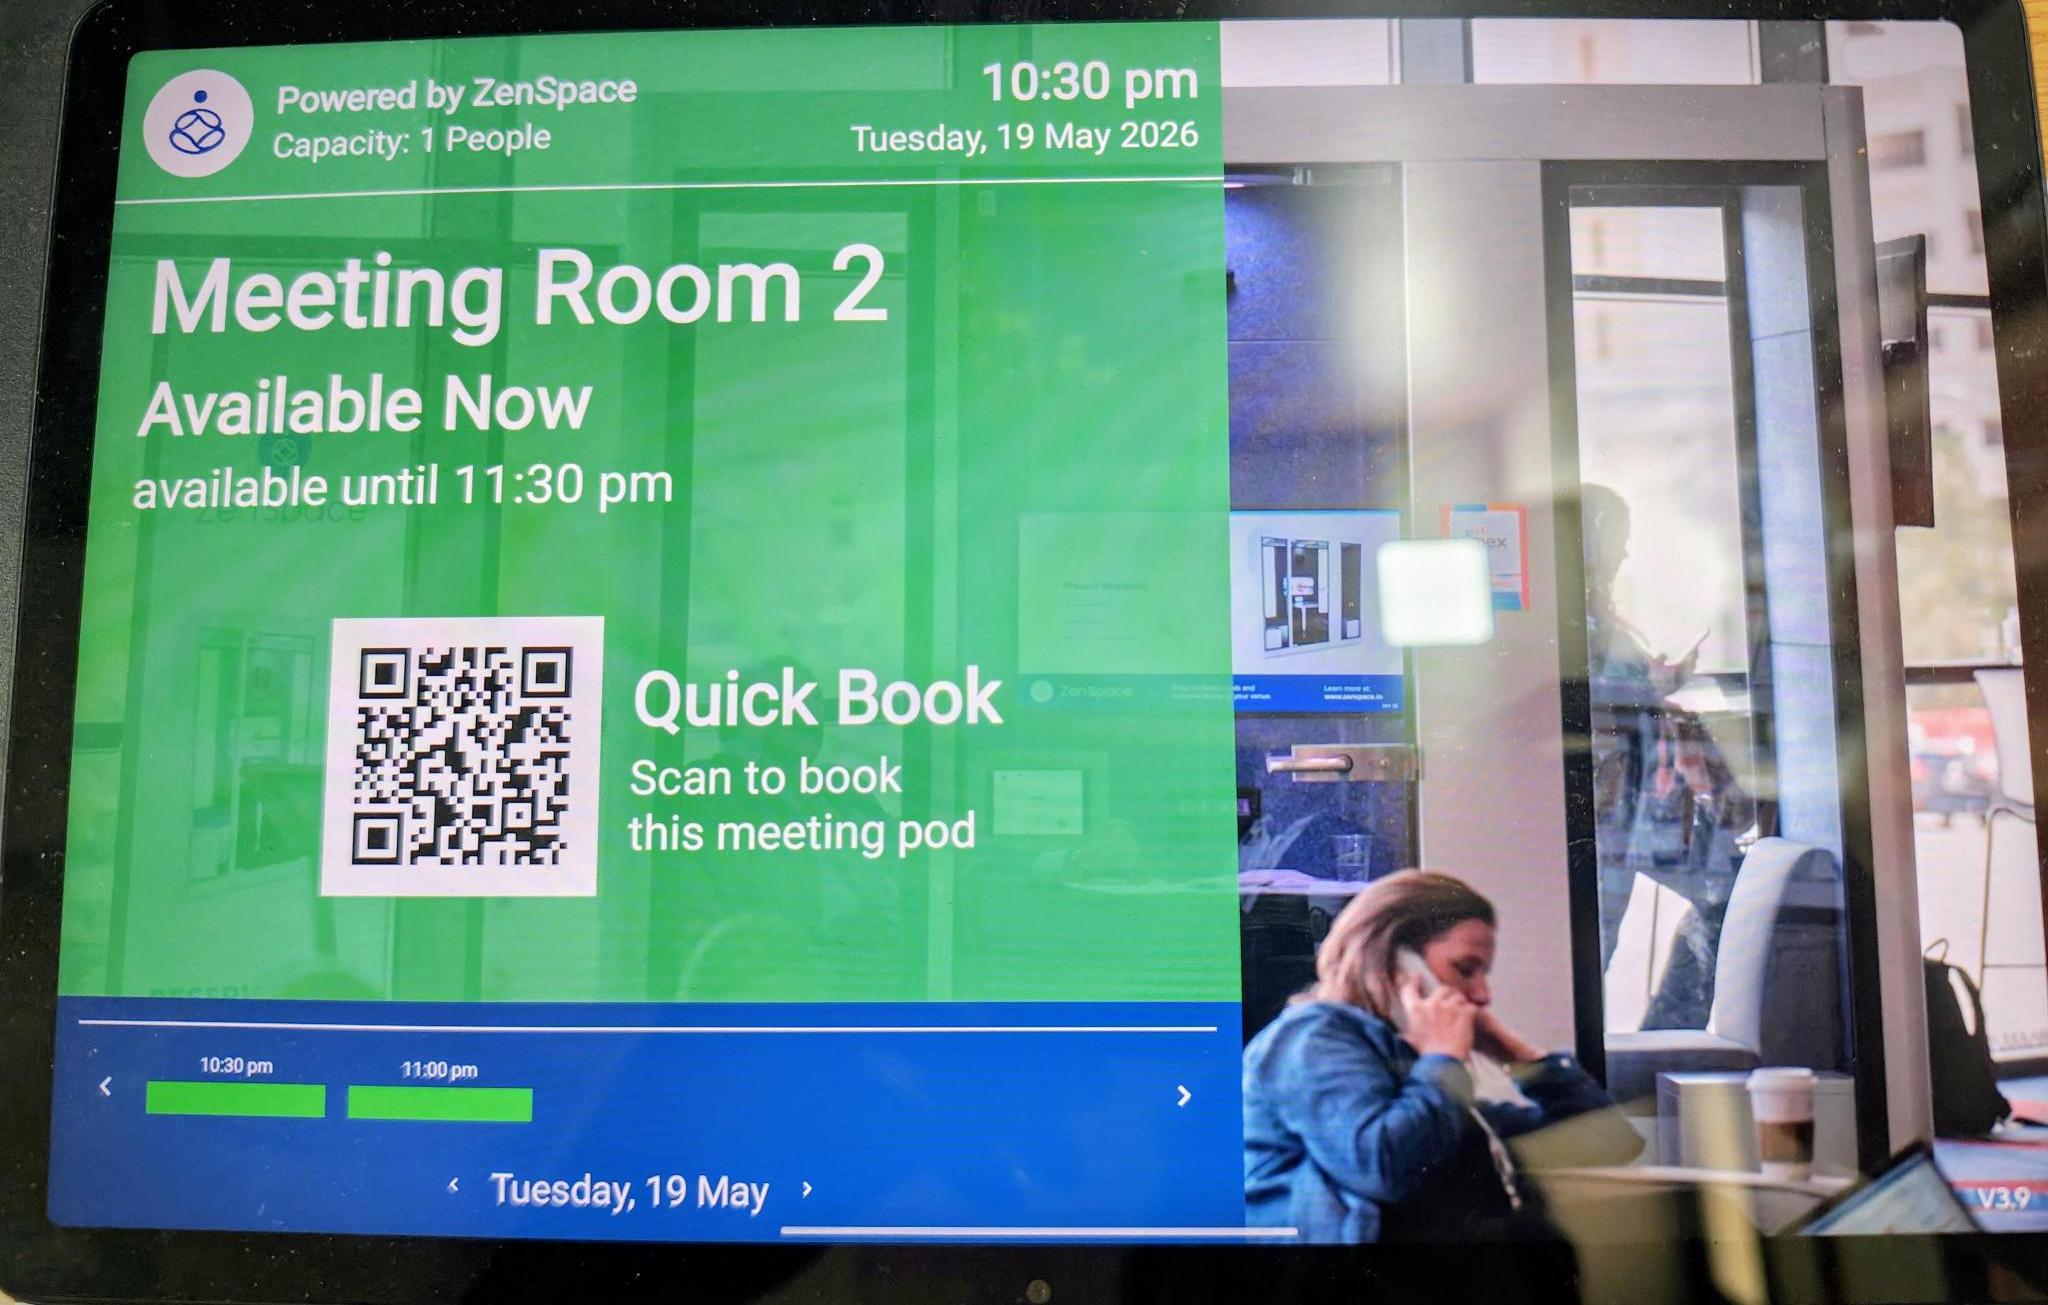
Step 1 — Scan the QR code
The user approaches Meeting Room 2 and sees the ZenSpace room display. The tablet shows the room status (Available Now), capacity, current date/time, and a QR code labelled Quick Book. The user scans the QR code using their phone camera.
Step 2 — Land on the booking page
Scanning the QR opens the ZenSpace booking page in the phone browser:
https://book.zenspace.io/fastmarket/demo/
The page loads with the location header (Demo — Red Rock Casino Resort and Spa, Las Vegas), and pre-fills the current date and the next available time slot. The availability counter on the right shows 1/1 Available.
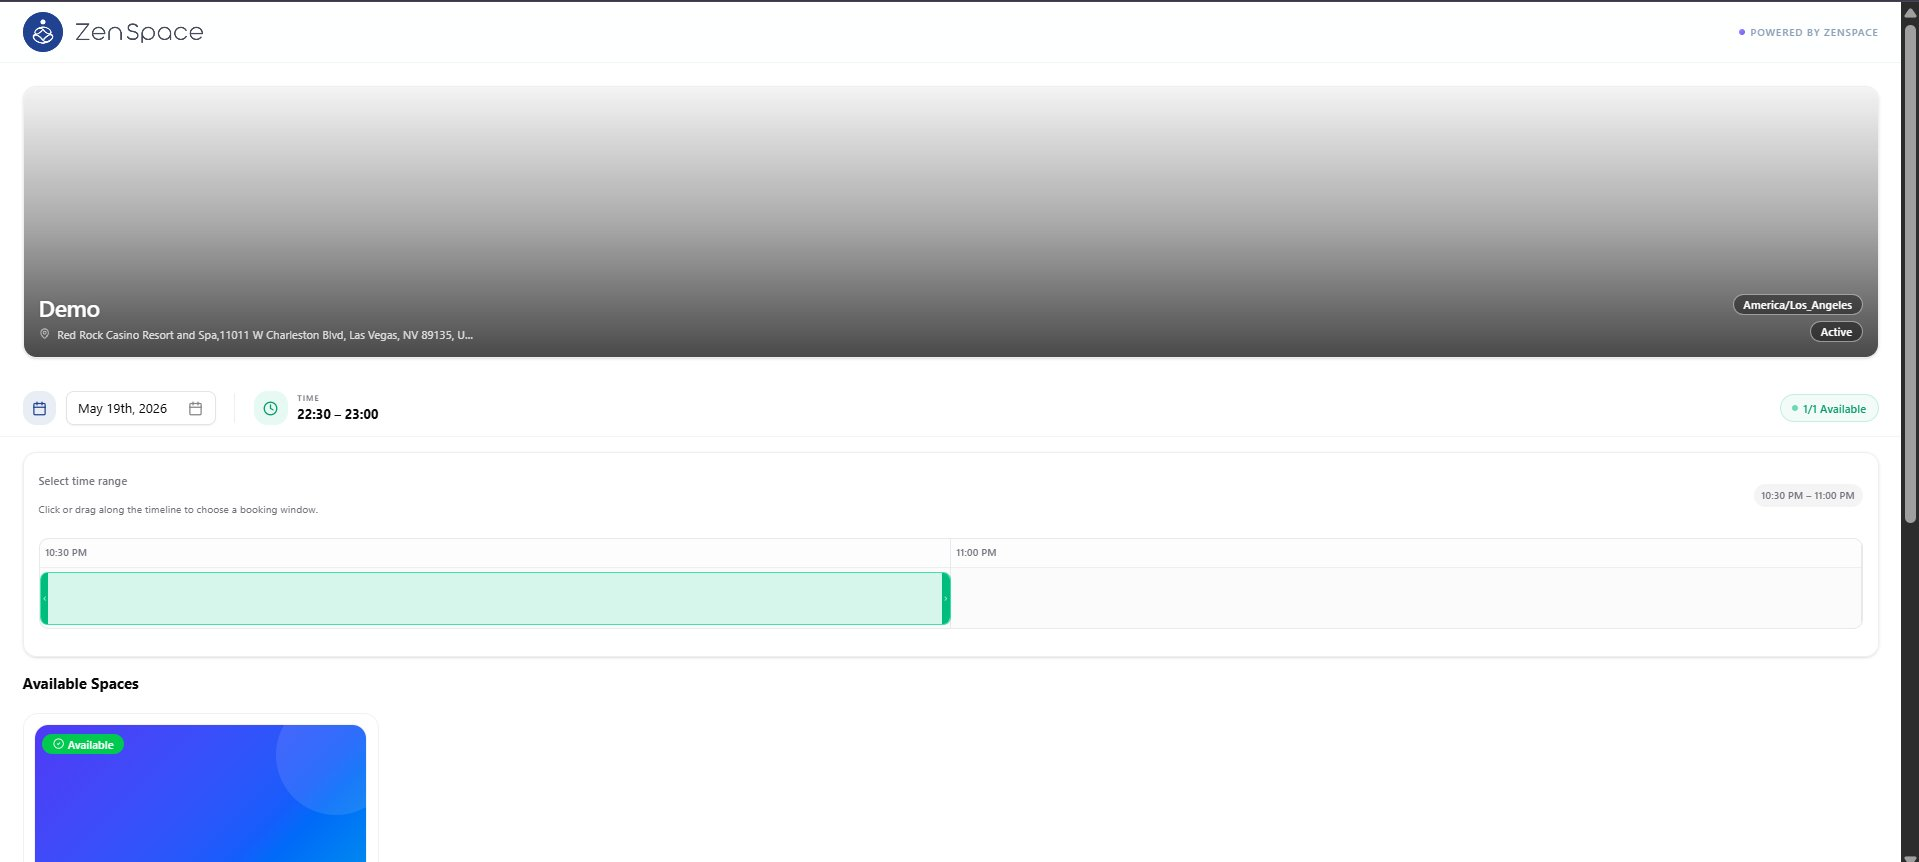
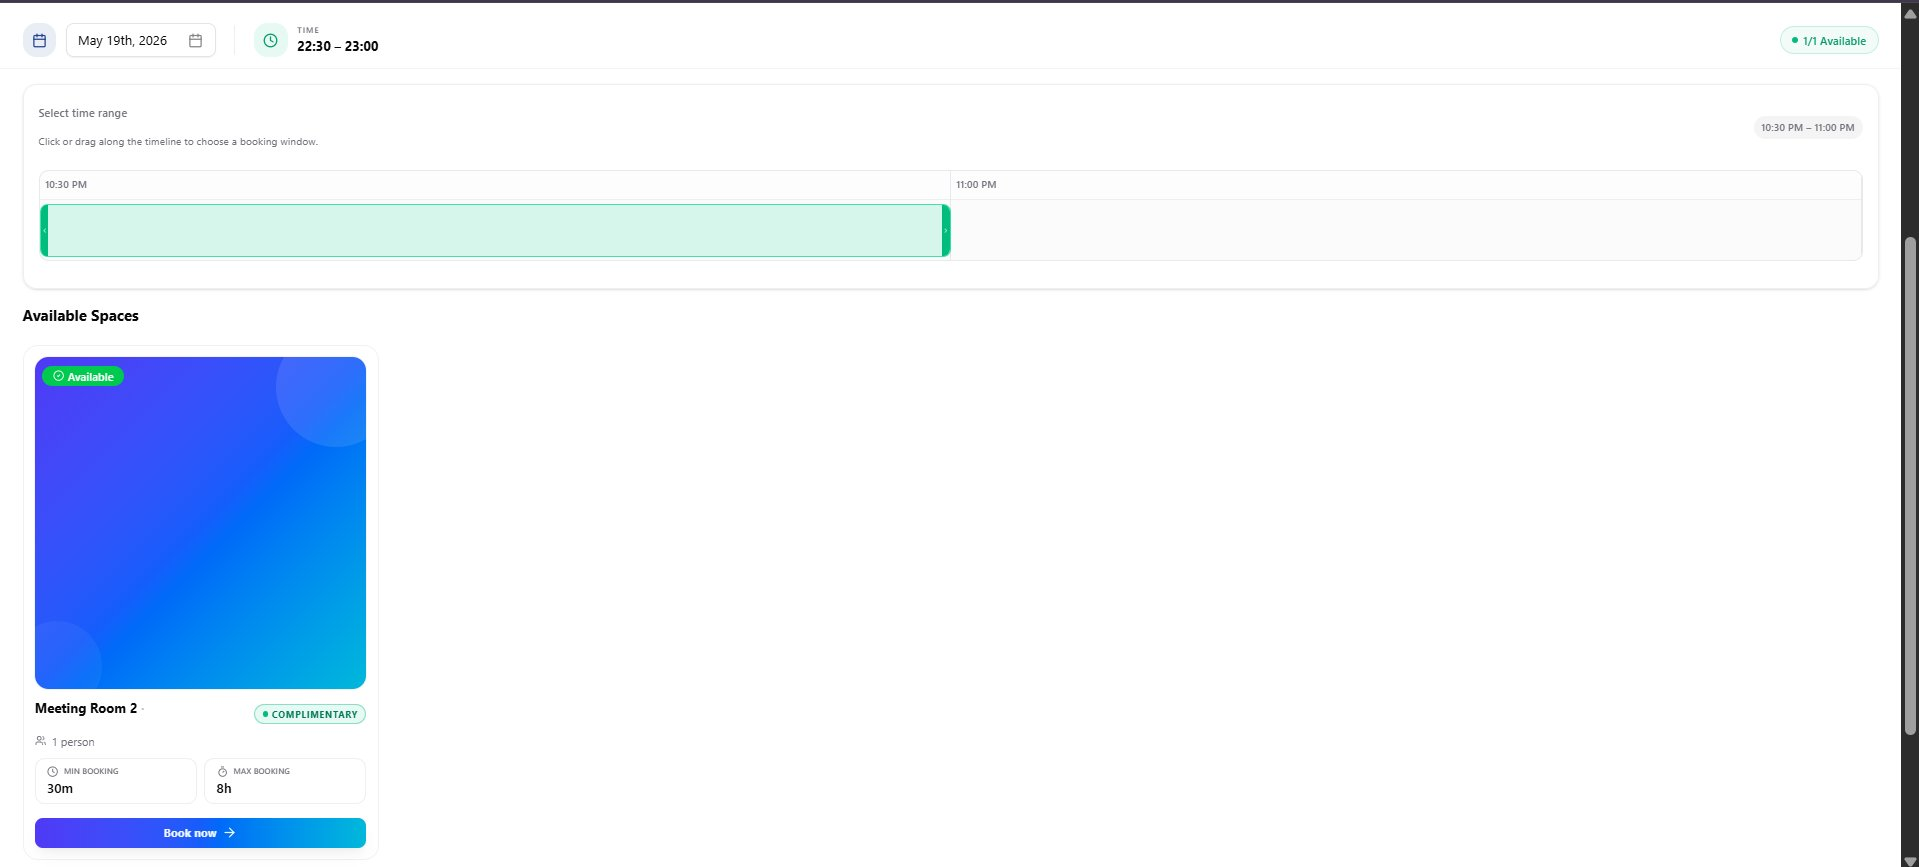
Step 3 — Choose a meeting space
The user can adjust the booking window using the Select time range slider. Under Available Spaces, matching rooms are listed as cards with capacity, min booking (30m), and max booking (8h). The user taps Book now on the room they want.
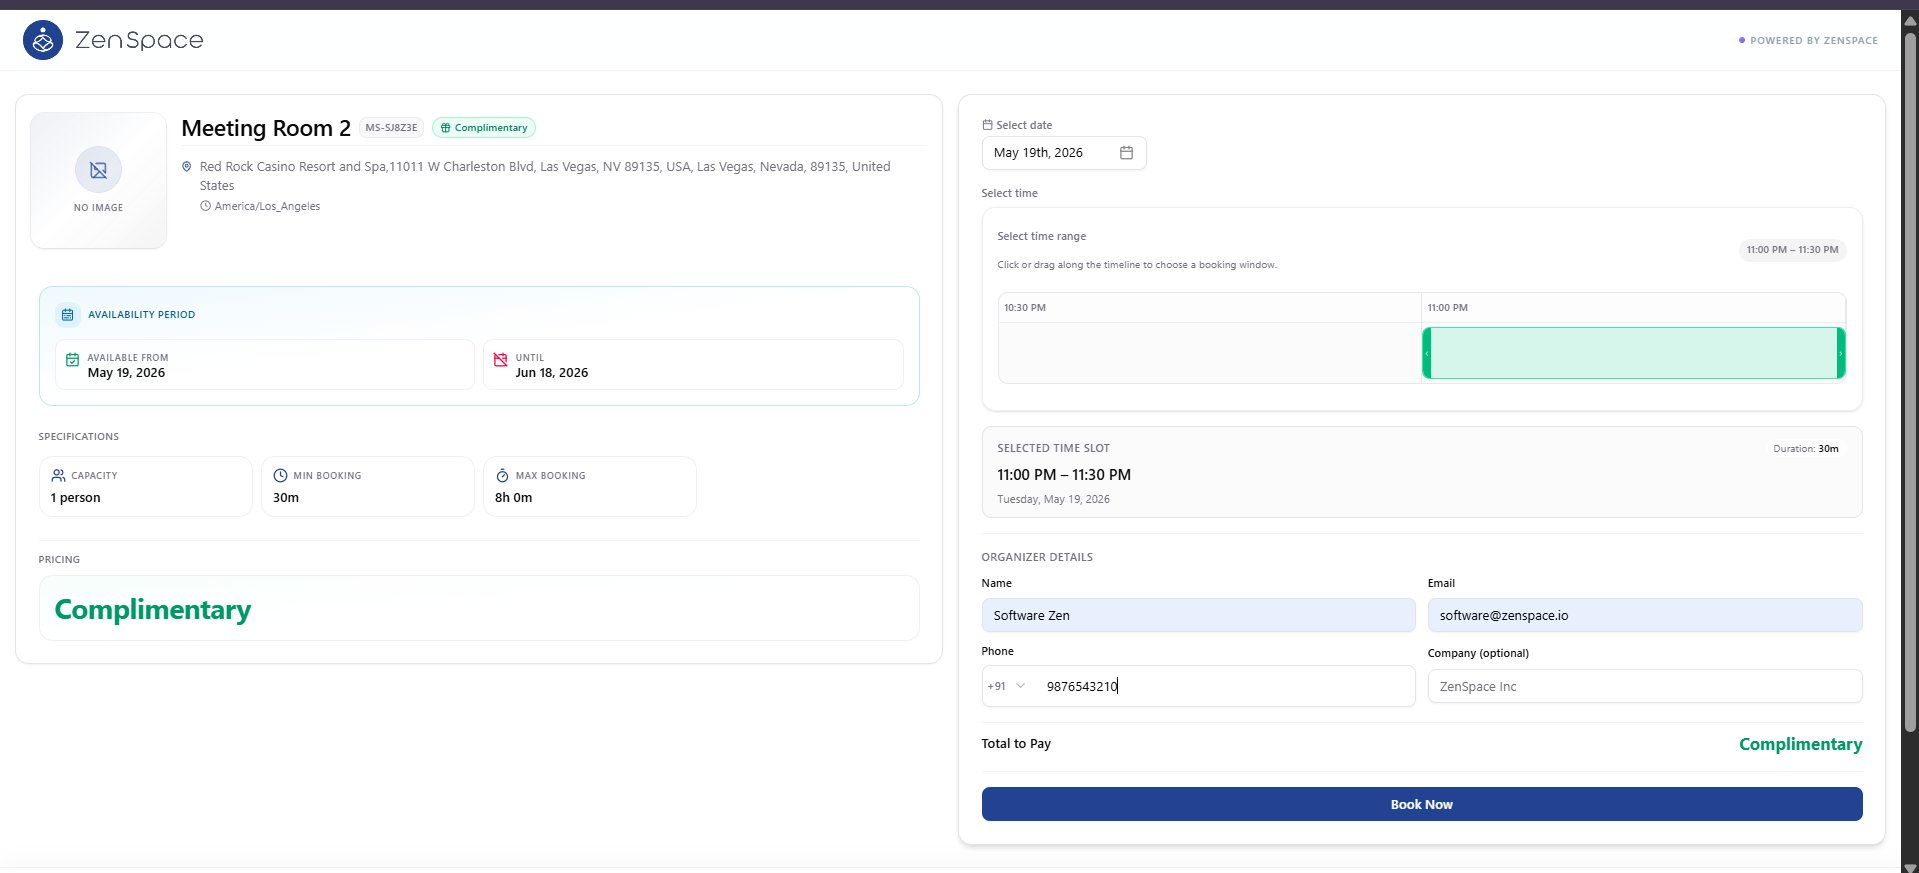
Step 4 — Fill organizer details and confirm
The Meeting Space detail page opens. On the left, the user sees the room specifications, availability period, and pricing (Complimentary). On the right, the user finalises the booking by:
- Selecting the date and time range on the timeline slider
- Reviewing the Selected Time Slot summary (e.g. 11:00 PM – 11:30 PM, 30m duration)
- Filling in Organizer Details — Name, Email, Phone, and Company (optional)
- Tapping the Book Now button at the bottom
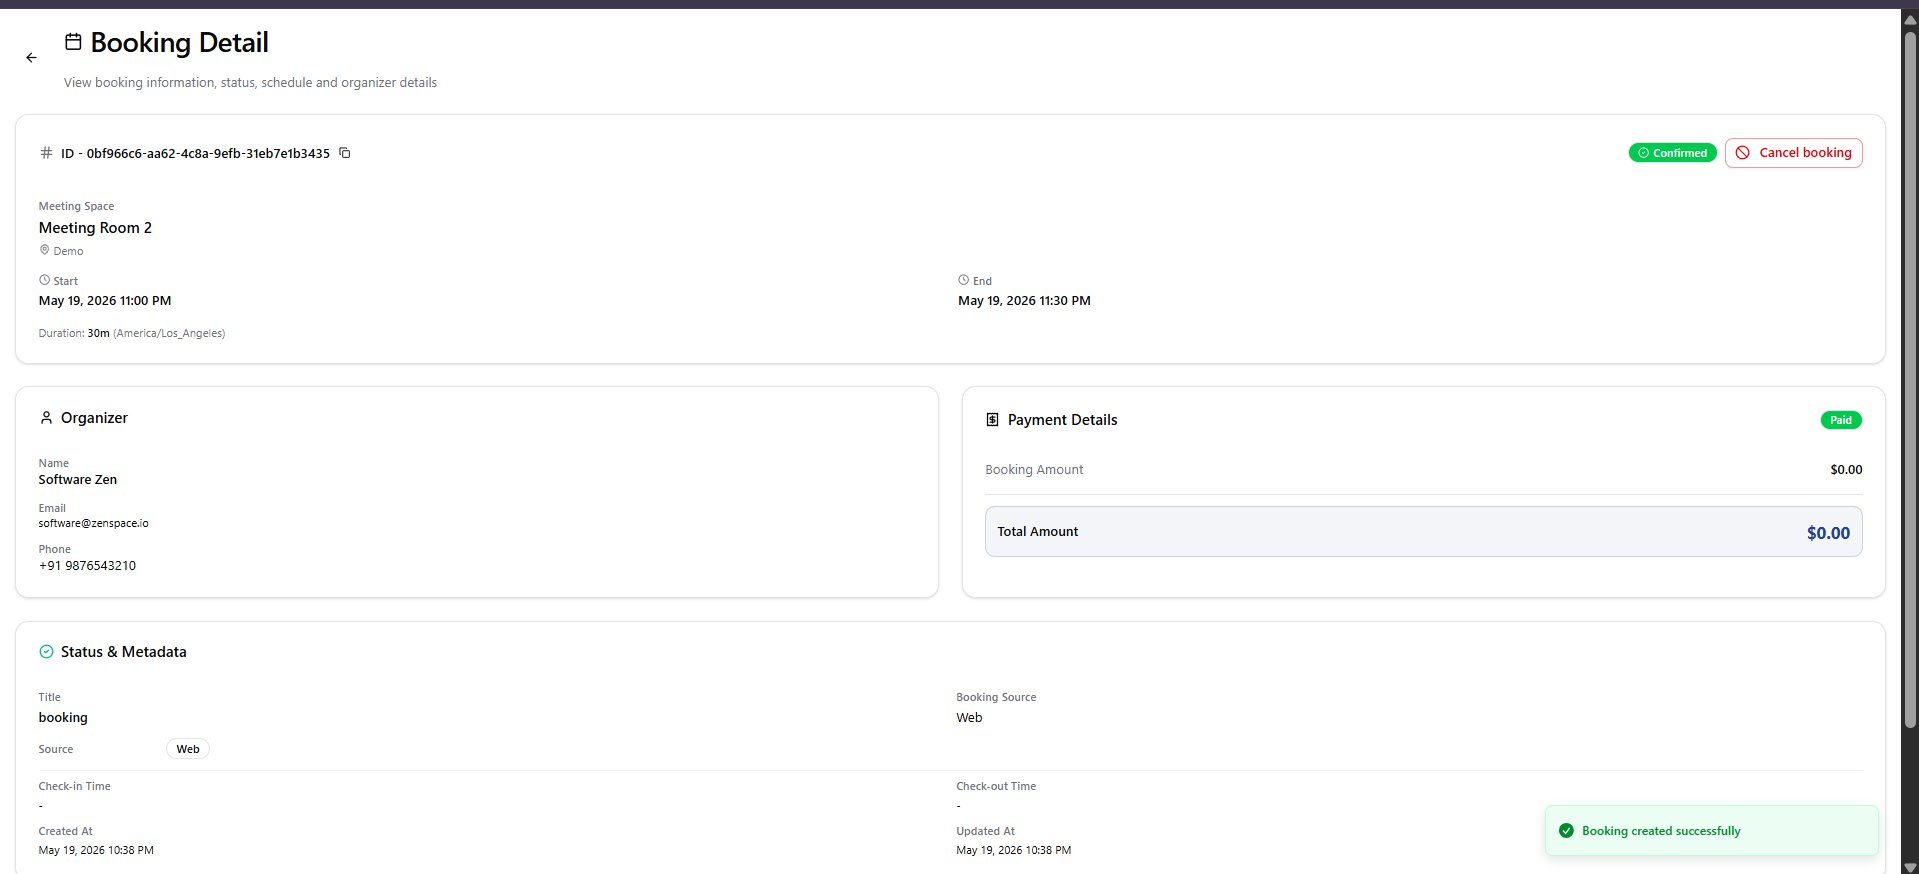
Step 5 — Booking confirmed
Once Book Now is tapped, the booking is created and the Booking Detail page opens with a Booking created successfully toast. The page shows:
- Booking ID and Confirmed status, with a Cancel booking option
- Meeting space, start/end time, duration, and timezone
- Organizer details and payment status (Paid · $0.00 for complimentary)
- Status & metadata — booking source, check-in/out times, created/updated timestamps
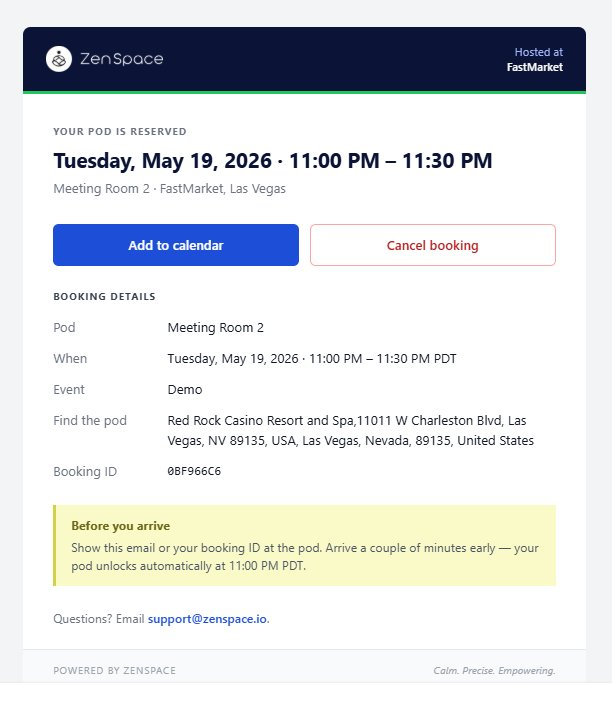
Step 6 — Confirmation email
In parallel, a confirmation email is sent to the organizer’s email address. The email header reads Your pod is reserved and includes:
- Booking date, time slot, and meeting space (e.g. Meeting Room 2 · FastMarket, Las Vegas)
- Action buttons — Add to calendar and Cancel booking
- Full booking details — Pod, When, Event, Find the pod, Booking ID
- A Before you arrive note explaining that the pod unlocks automatically at the booking start time
- Support contact — support@zenspace.io
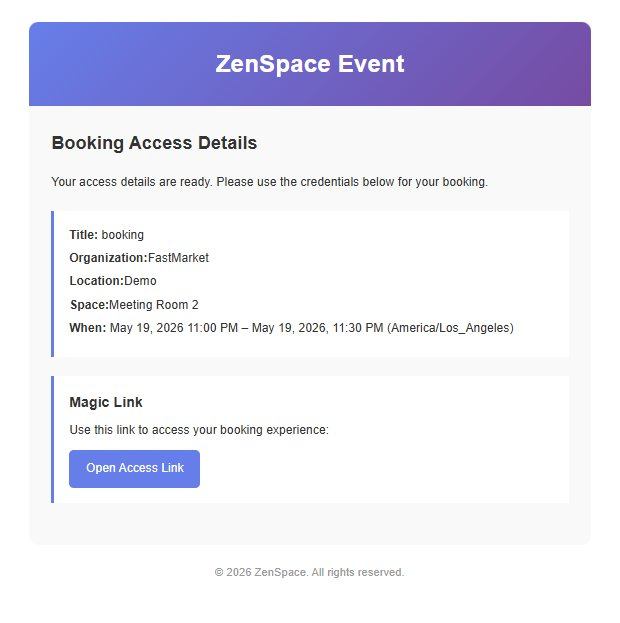
Step 7 — Access details email (Magic Link)
In addition to the confirmation email, the user receives a separate Booking Access Details email from ZenSpace Event. This email carries the credentials and access link the organizer uses on the day of the booking. It includes:
- Booking summary — Title, Organization (FastMarket), Location (Demo), Space (Meeting Room 2), and When (with timezone)
- A Magic Link section with an Open Access Link button — used to access the booking experience without needing to log in
Summary
-
Scan the QR code on the room display.
-
Land on book.zenspace.io with location and time pre-filled.
-
Pick a room from the Available Spaces list.
-
Fill organizer details on the detail page and tap Book Now.
-
Booking confirmed page opens with full booking details.
-
Confirmation email arrives with calendar link and booking ID.
-
Access Details email arrives with the Magic Link to open the booking.
The room display flips to Reserved for the booked window, and the pod unlocks automatically at the booking start time.