Discover & Browse
The guest arrives at the venue’s ZenSpace booking page. Here the venue is Grand Meridian and the group is Meeting Pods; the header reads “Powered by ZenSpace” — the host’s brand stays front and centre while ZenSpace runs underneath.
-
Pick date & time. A live timeline lets the guest click or drag to choose a booking window for the selected day.
-
See live availability. A counter beside the date shows how many spaces are free for the chosen slot (for example, 12/12 Available), and every card carries an Available badge.
-
Compare spaces side by side. Capacity, hourly price, minimum and maximum booking length, and key amenities are all shown upfront.
-
See which booking modes apply. Cards are tagged Hourly and Full day, with “Full day available” confirming the space can be reserved for a whole day rather than by the hour.
-
Switch views. An Available / Status toggle sits above the list — Available filters to what is free, Status shows the whole group (see stage 2).
-
Book now. A single button on each card moves the guest into that space’s detail and booking form.
Note The group mixes space types — conference rooms, executive boardrooms, and meeting pods — so capacity ranges from 6 to 30 people and pricing from $25.00 to $150.00 per hour. Specifications and amenities are inherited from the venue’s ZenCore setup: what operators configure is exactly what guests see.
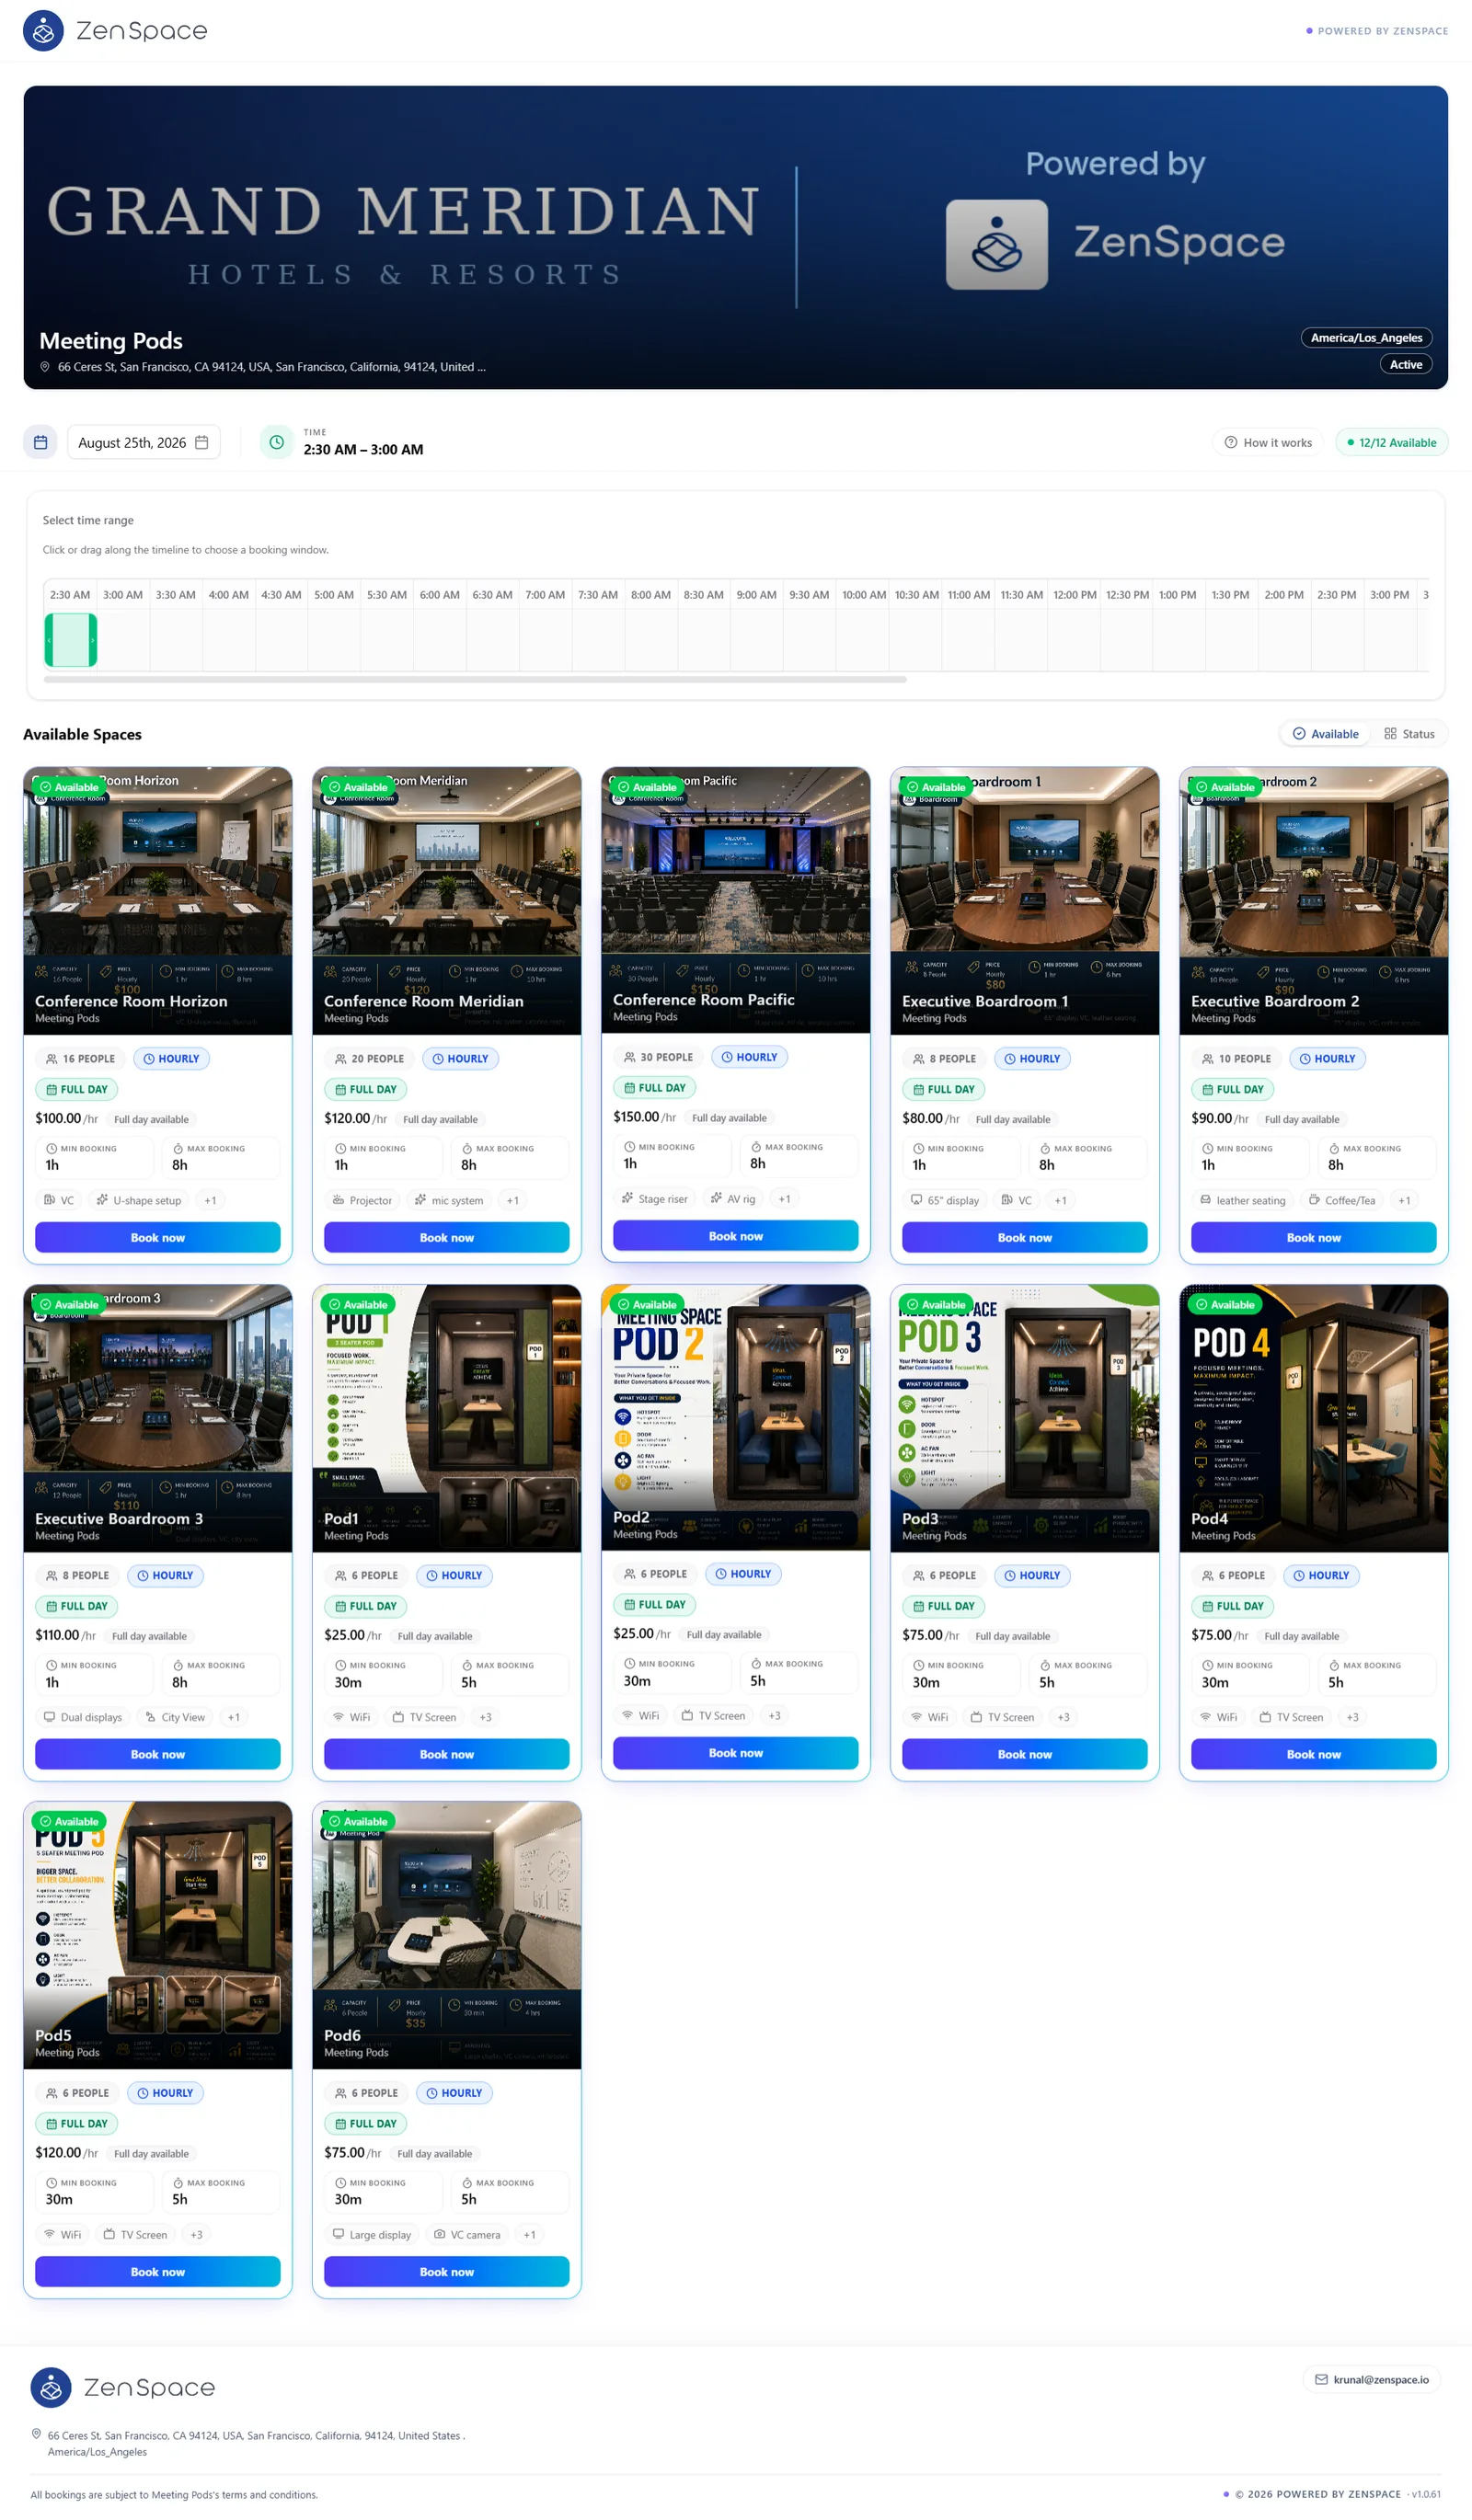
Figure 1 — The co-branded venue landing page with date/time picker, view toggle, and all available spaces.
The “How it works” guided tour
A How it works button in the page header launches a four-step walkthrough that points at each control in turn. Every step offers Back and Next, a progress indicator, and a “Skip, I’ll explore on my own” link; the final step closes with Got it.
Tip The tour is the quickest way to orient a new client during a demo — it explains the date picker, timeline, and Status view without any narration.
Step 1 — Pick your date. Today is selected by default; tapping the date field books for another day.
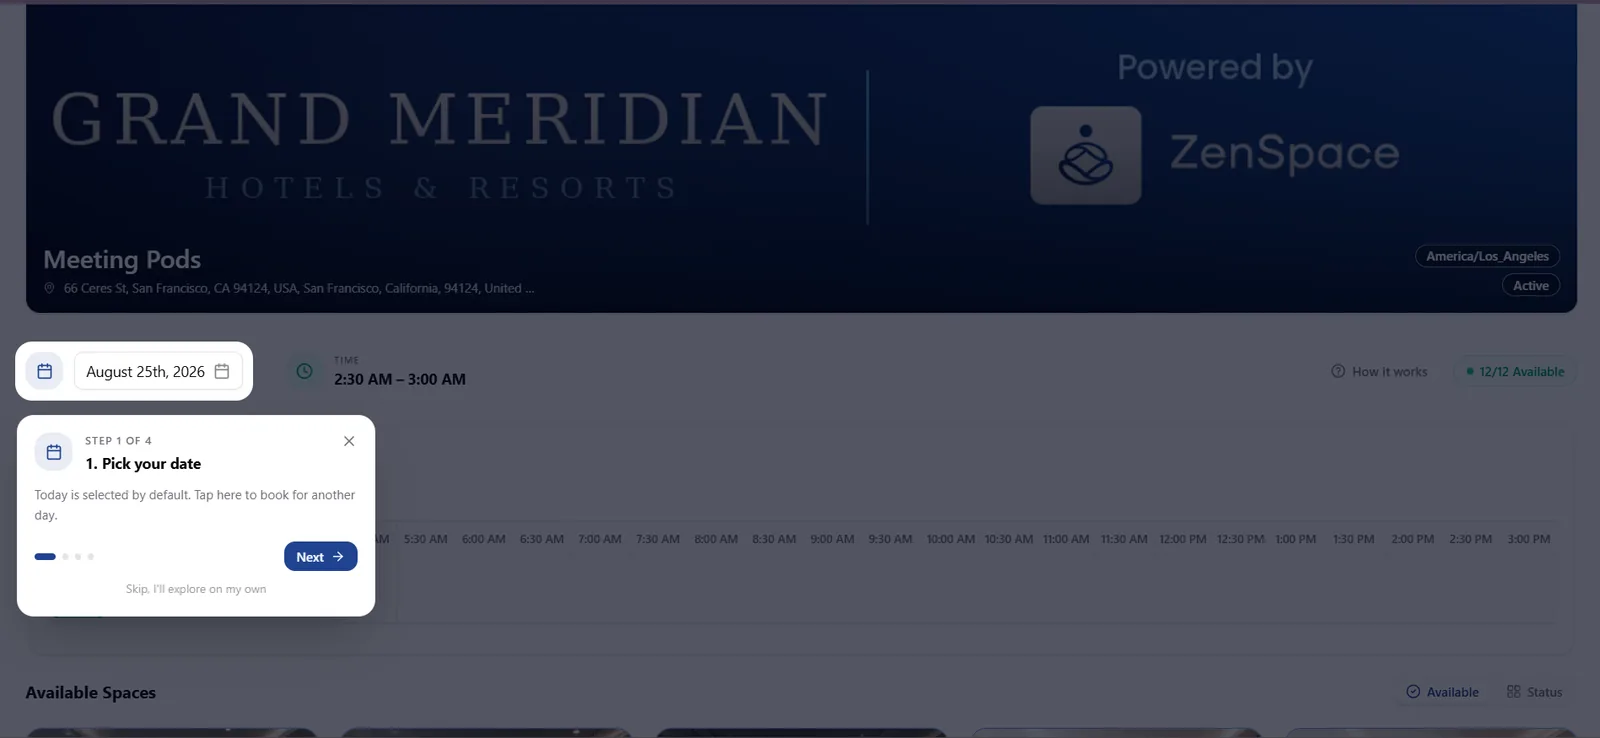
Figure 2 — Step 1 of the guided tour — picking the date.
Step 2 — Choose your time. The ends of the green bar drag to set start and end time, with dropdowns on smaller screens. Greyed-out blocks are already taken.
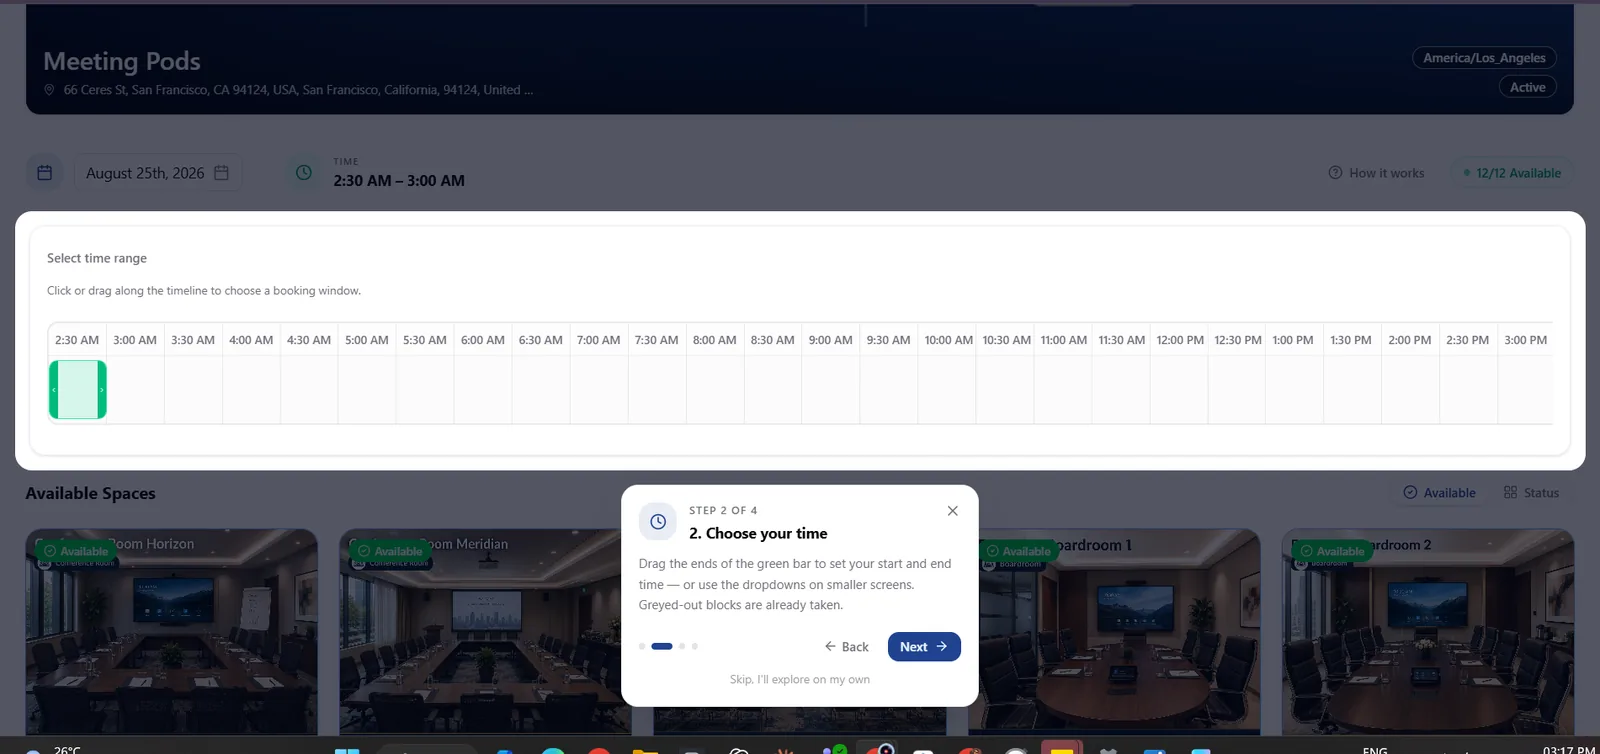
Figure 3 — Step 2 of the guided tour — choosing the time range.
Step 3 — Book an available space. Only spaces free for the chosen time are listed, with capacity and price. Tapping Book now on one moves the guest forward.
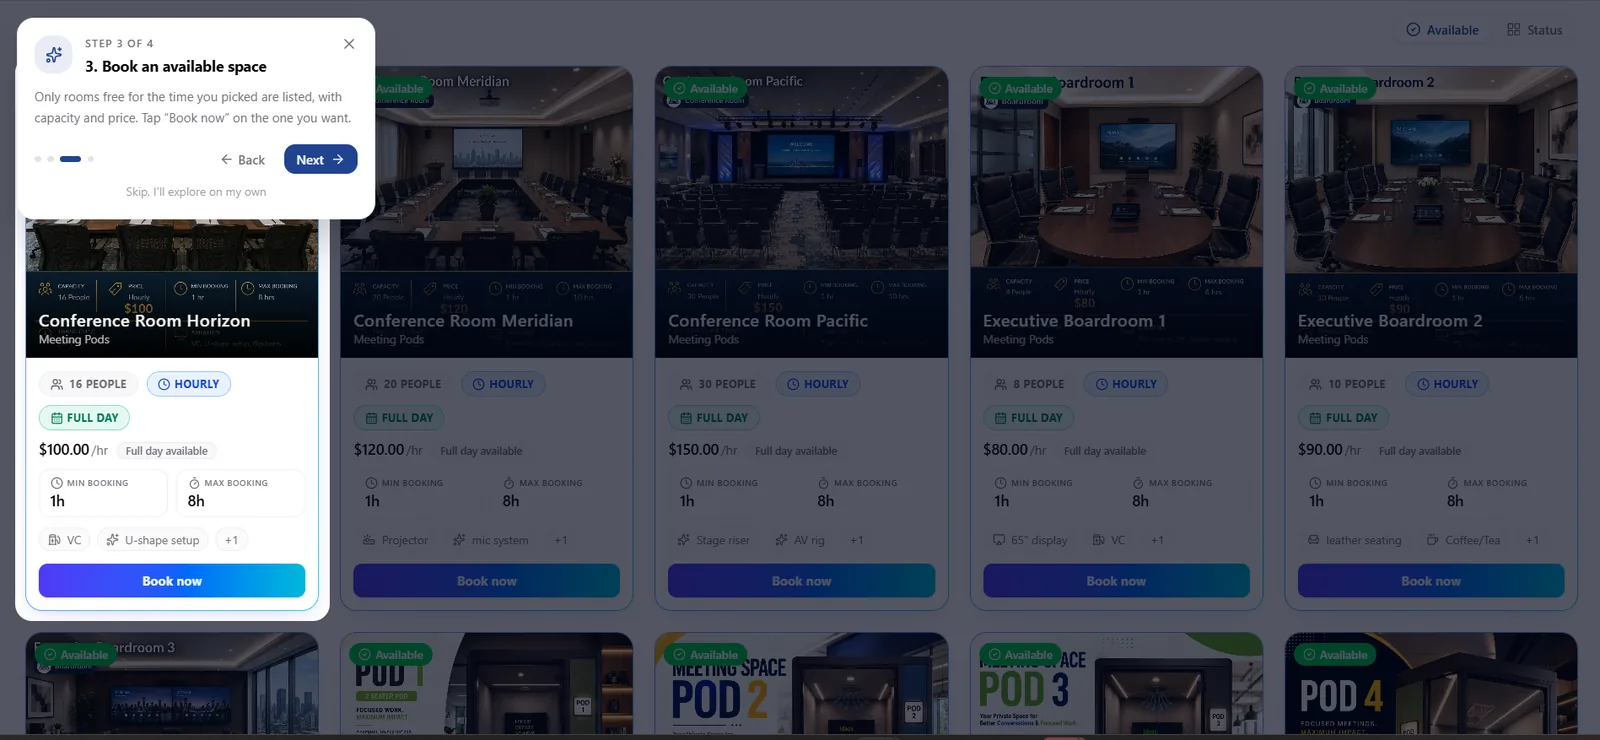
Figure 4 — Step 3 of the guided tour — booking an available space.
Step 4 — Want the full picture? Switching to Status shows every space in the group, the taken ones included, each with a timeline of today and when it next frees up.
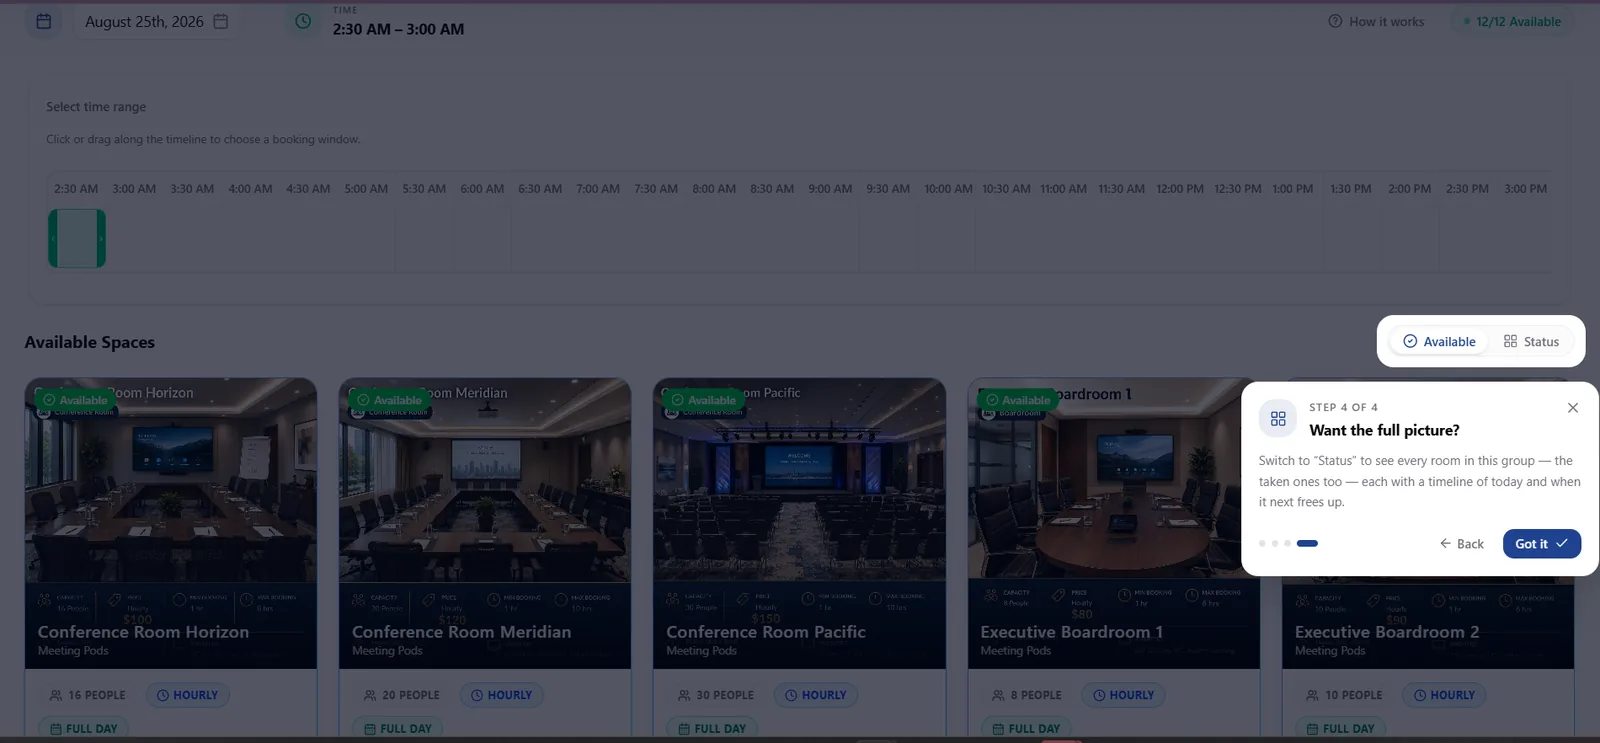
Figure 5 — Step 4 of the guided tour — pointing the guest to the Status view.