Confirmation
A successful payment advances the checkout to step 4, Confirmed. The guest sees an on-screen confirmation immediately and receives the branded receipt by email, which doubles as the calendar entry.
-
On-screen confirmation. A Payment successful panel restates the Booking ID, date and time, space, and total paid.
-
Next steps spelled out. Three lines confirm where the receipt was sent, that access instructions arrive with it, and which venue address to contact for changes.
-
Two ways onward. View Booking Details opens the booking record; Go To Meeting Space returns the guest to the space.
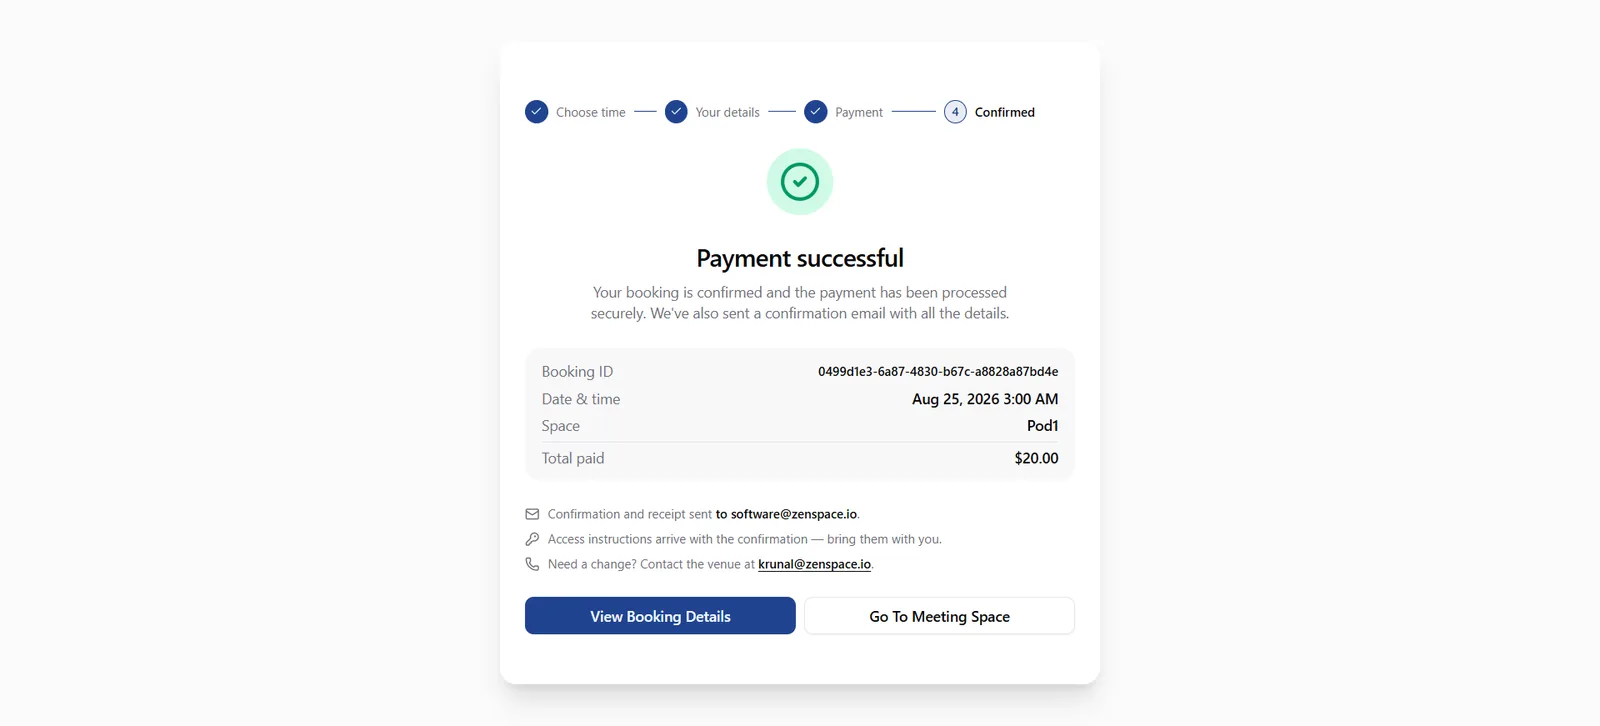
Figure 10 — The in-app confirmation shown immediately after a successful payment.
The receipt email follows within moments and doubles as the calendar entry.
-
Email receipt. The email restates pod, date and time, event, address, and Booking ID, with a payment details block showing the amount paid and the payment date.
-
Add to calendar. An Add to calendar button and an attached .ics file let the guest schedule it in one tap; a Cancel booking link is offered alongside.
-
Before you arrive. A short reminder explains the guest can show the email or Booking ID and that the space unlocks automatically at the start time.
Tip The footer carries the ZenSpace voice line — Calm. Precise. Empowering. — keeping the brand consistent into the inbox.
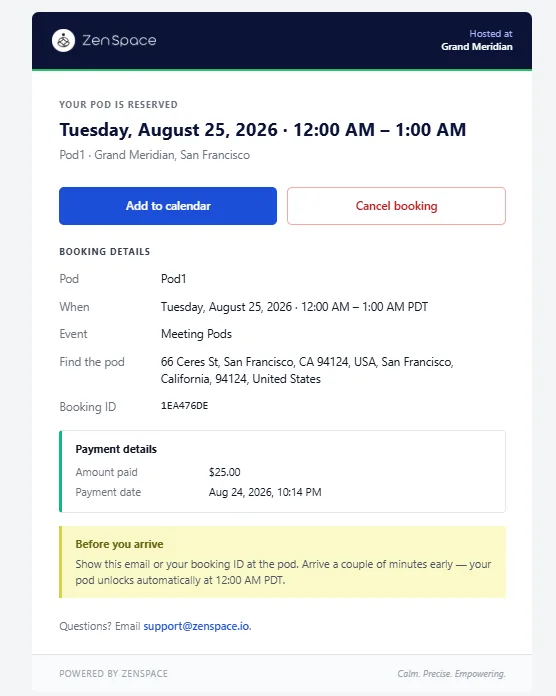
Figure 11 — The branded booking confirmation email with payment breakdown and calendar invite.